Code Signing a Windows application
Today, we released our WordPress.com Desktop app on Windows, the app takes advantage of all the work put in creating the Calypso app which is the Javascript client code that powers WordPress.com, which is all open source.
To build the desktop apps, we use Electron which bundles Javascript, Node and the Chromium browser together into a cross-platform application. Electron works on Windows, OS X and Linux and is used by Slack, Github and Microsoft among others.
The tricky part distributing the apps is getting them packaged properly for each platform, and to sign these packages properly. Downloadable and distributed software is much different than server side web apps that we’re used to.
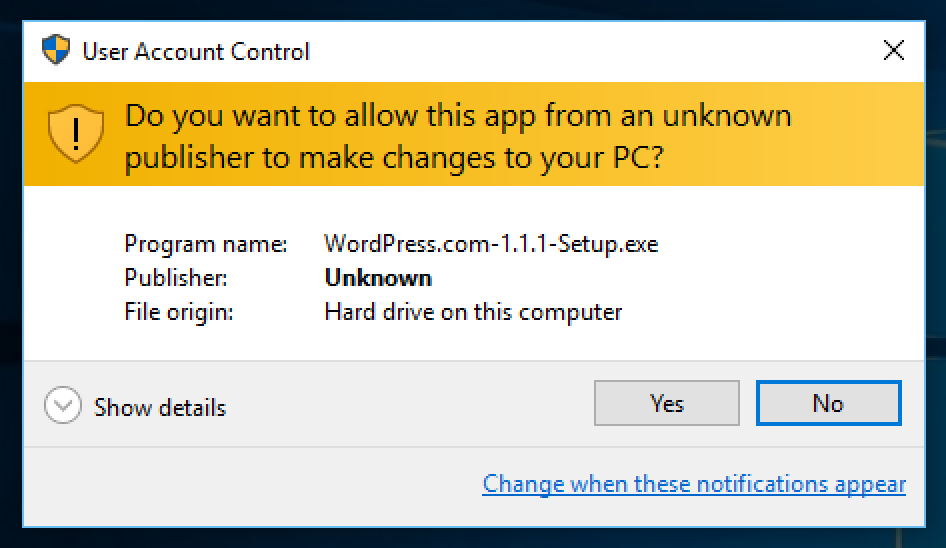
You can see an improperly signed application with the “Publisher: Unknown”
So here’s a quick guide on lessons learned, that might help you get your installer signed properly from the start. Note, the instructions are for signing an already built Setup.exe installer. For info on building the installer, see electron-builder.
Get Code Signing Certificate
This wasn’t too bad, just a little time consuming and requires some real world contact with actual people. Based on this list of recommended vendors, I decided to get a standard certificate from Digicert, I imagine the process is relatively the same for the other vendors.
I ended up going with a standard certificate and not an EV cert, since the EV cert required a physical hardware device. Our company is distributed around the world and I don’t want to be the only one who can release the app.
I followed the instructions at Digicert to get a Microsoft Authenticode certificate. It required providing company information and a corporate phone number to call and verify. Be sure to know how to retrieve calls or voice mail from your company number.
Certificate Format
After receiving the certificate, you download it to your computer’s keychain, on Mac it works best to use Safari or Chrome to do this. From your keychain, you can export the certificate to a PFX/P12 file.
If you are signing on Windows, you can use the P12 certificate directly.
If you are signing on OS X, you need to convert it into a usable format. I found converting to a SPC and PVK files worked best. One rub, to convert the certificates you need to use a newer version of openssl than what ships with OS X, install using brew install openssl
alias openssl='/usr/local/opt/openssl/bin/openssl'

openssl pkcs12 -in code-cert.p12 -nocerts -nodes -out temp-rsa.pem
openssl rsa -in temp-rsa.pem -outform PVK -pvk-strong -out code-cert.pvk

openssl pkcs12 -in code-cert.p12 -nokeys -nodes -out temp-cert.pem
openssl crl2pkcs7 -nocrl -certfile temp-cert.pem -outform DER -out
code-cert.spc
Signing Application
It is recommended to sign the apps using at minimum SHA1 algorithm, signtool.exe defaults to SHA1, unfortunately signcode defaults to MD5, so you must pass in a flag to change. Using SHA256 or SHA512 is even better, but not as compatible so most still use SHA1.
Additionally adding a timestamp signature cryptographically proves that your package was signed at a specific time, which offers two benefits: (1) The signature remains valid even after the signing certificate expires since the signing took place when the certificate was valid. (2) It can be used by the operating system as a compatibility measure, future packages might be required to be signed differently, with a timestamp you ensure the package was compatible at that time.
On Windows
On Windows, you can use the signtool.exe, which is installed with Visual Studio and Windows SDK. The tool is found on my Windows 10 installation under C:Program Files (x86)Windows Kits10binx86signtool.exe
Using the P12 file directly, you simply can sign using, replace PASS with your passcode:
signtool.exe sign /t http://timestamp.digicert.com /f code.p12 /p PASS App-Setup.exe
You can also use the tool to verify a signature is valid:
signtool.exe verify /pa /v App-Setup.exe
On OS X
On OS X, once you have the SPC and PVK file, you can sign using signcode that ships with the Mono tools. Install using brew install mono
You can then sign using the following command, you’ll be prompted for your passcode.
signcode -a sha1 -t http://timestamp.digicert.com
    -spc code-cert.spc -pvk code-cert.pvk
    -n "Description" App-Setup.exe
Verify Signature
You can verify it got signed properly using the signtool.exe on Windows, or right-click and select “Properties » Digital Signatures”.
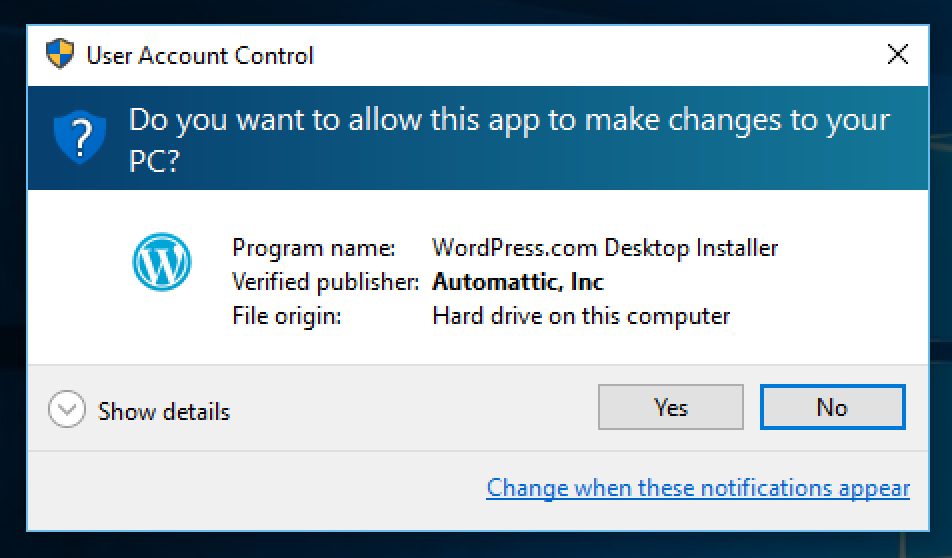
When you run the installer now you should see the “Verified publisher” filled in with your certificate information.
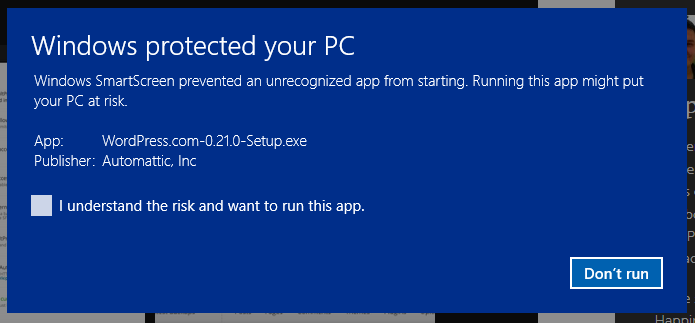
Microsoft SmartScreen
Even after signing your app properly, there is an extra step of protection called the SmartScreen which can display during installation. It is my understanding that this is displayed based on the reputation of your certificate. So as more valid installs occur, it will go away and not display to users.
In an attempt to improve our reputation, I saw one recommendation to Microsoft’s Hardware Dev Center which has a file signing section. I registered our company and walked through uploading a signed sample app. I’m not sure if this helps or not, but I figured it couldn’t hurt and might improve our certificate’s reputation.
Thanks to Eric Lawrence for offering valuable suggestions and reviewing the draft.