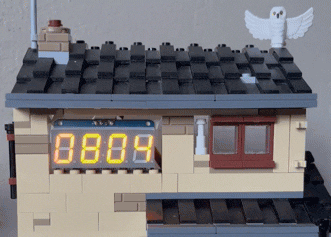
No. 4 Pihole Drive
I run a Pi-hole to block internet junk at the network level, which I wrote about previously. The Pi-hole has stats for number of queries blocked which is mildly interesting, but requires navigating to the admin page. I have a few 7-segment displays laying around from work prototypes, so why not use one to display the info.
My daughter has a couple of old Harry Potter LEGO sets she’s built and not really playing with, building’s the fun part. So why not jam them together and you get No. 4 Pi-hole Drive.

Materials:
- A Raspberry Pi - I recommend rpilocator.com to find one available.
- The LEGO set is No. 4 Privet Drive.
- Adafruit 7-segment display - get one with I2C backpack to make wiring easier.
- 4 female-to-female connector wires
Instructions
Build LEGO set
First you need a built LEGO set. I found it easiest to have a child, wait 10 years, and then have them build the set for me. I suppose it depends if you’re in a hurry.
Setup Pihole
Install the Pi-hole software on the Raspberry Pi. I used their command-line tool. See documentation on their site for install instructions (though it is about the same).
curl -sSL https://install.pi-hole.net | bash
Configure your computer’s network to use the Raspberry Pi for DNS. You can do this at the router, by seting the Pi as the DNS server for DHCP, or you can configure each device to use it.
Confirm it is working by visiting: http://pi.hole/admin (use your Pi domain) or you can run this command to show queries blocked in the last 24 hours.
echo ">stats >quit" | nc localhost 4711 | grep blocked_today
Setting up the Pihole is probably the hardest part, if you run into issues check out their site, or even the Reddit group your issue might be covered there.
Wiring
The 7-segment display with i2c backpack has 4 wires to connect to your Pi. They are VCC (Power), GND (Ground), SDA, and SCL.
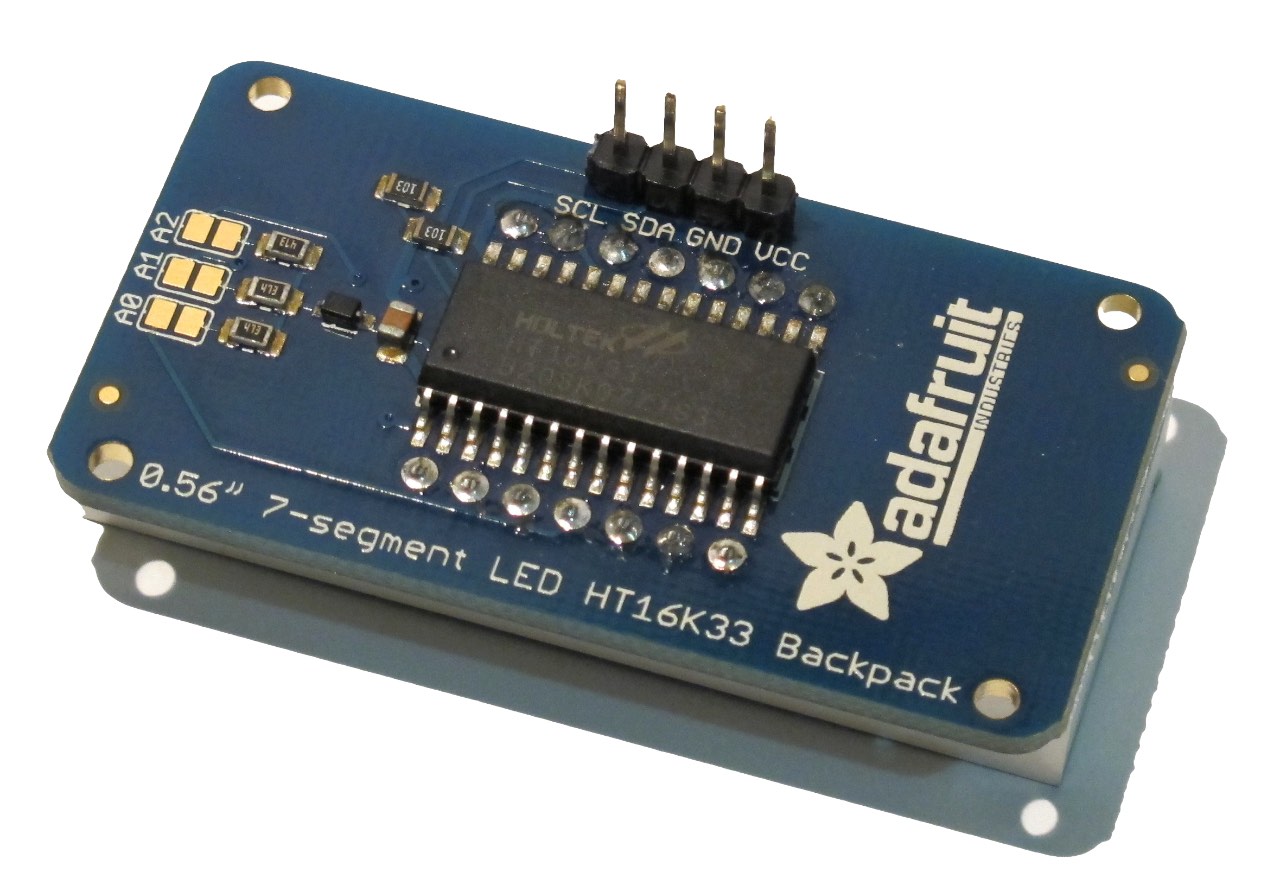
These pins should be connected to the corresponding Pi pins, these are Pin 1 for power (VCC), Pin 6 for ground (GND), Pin 3 for SDA, Pin 5 for SCL.
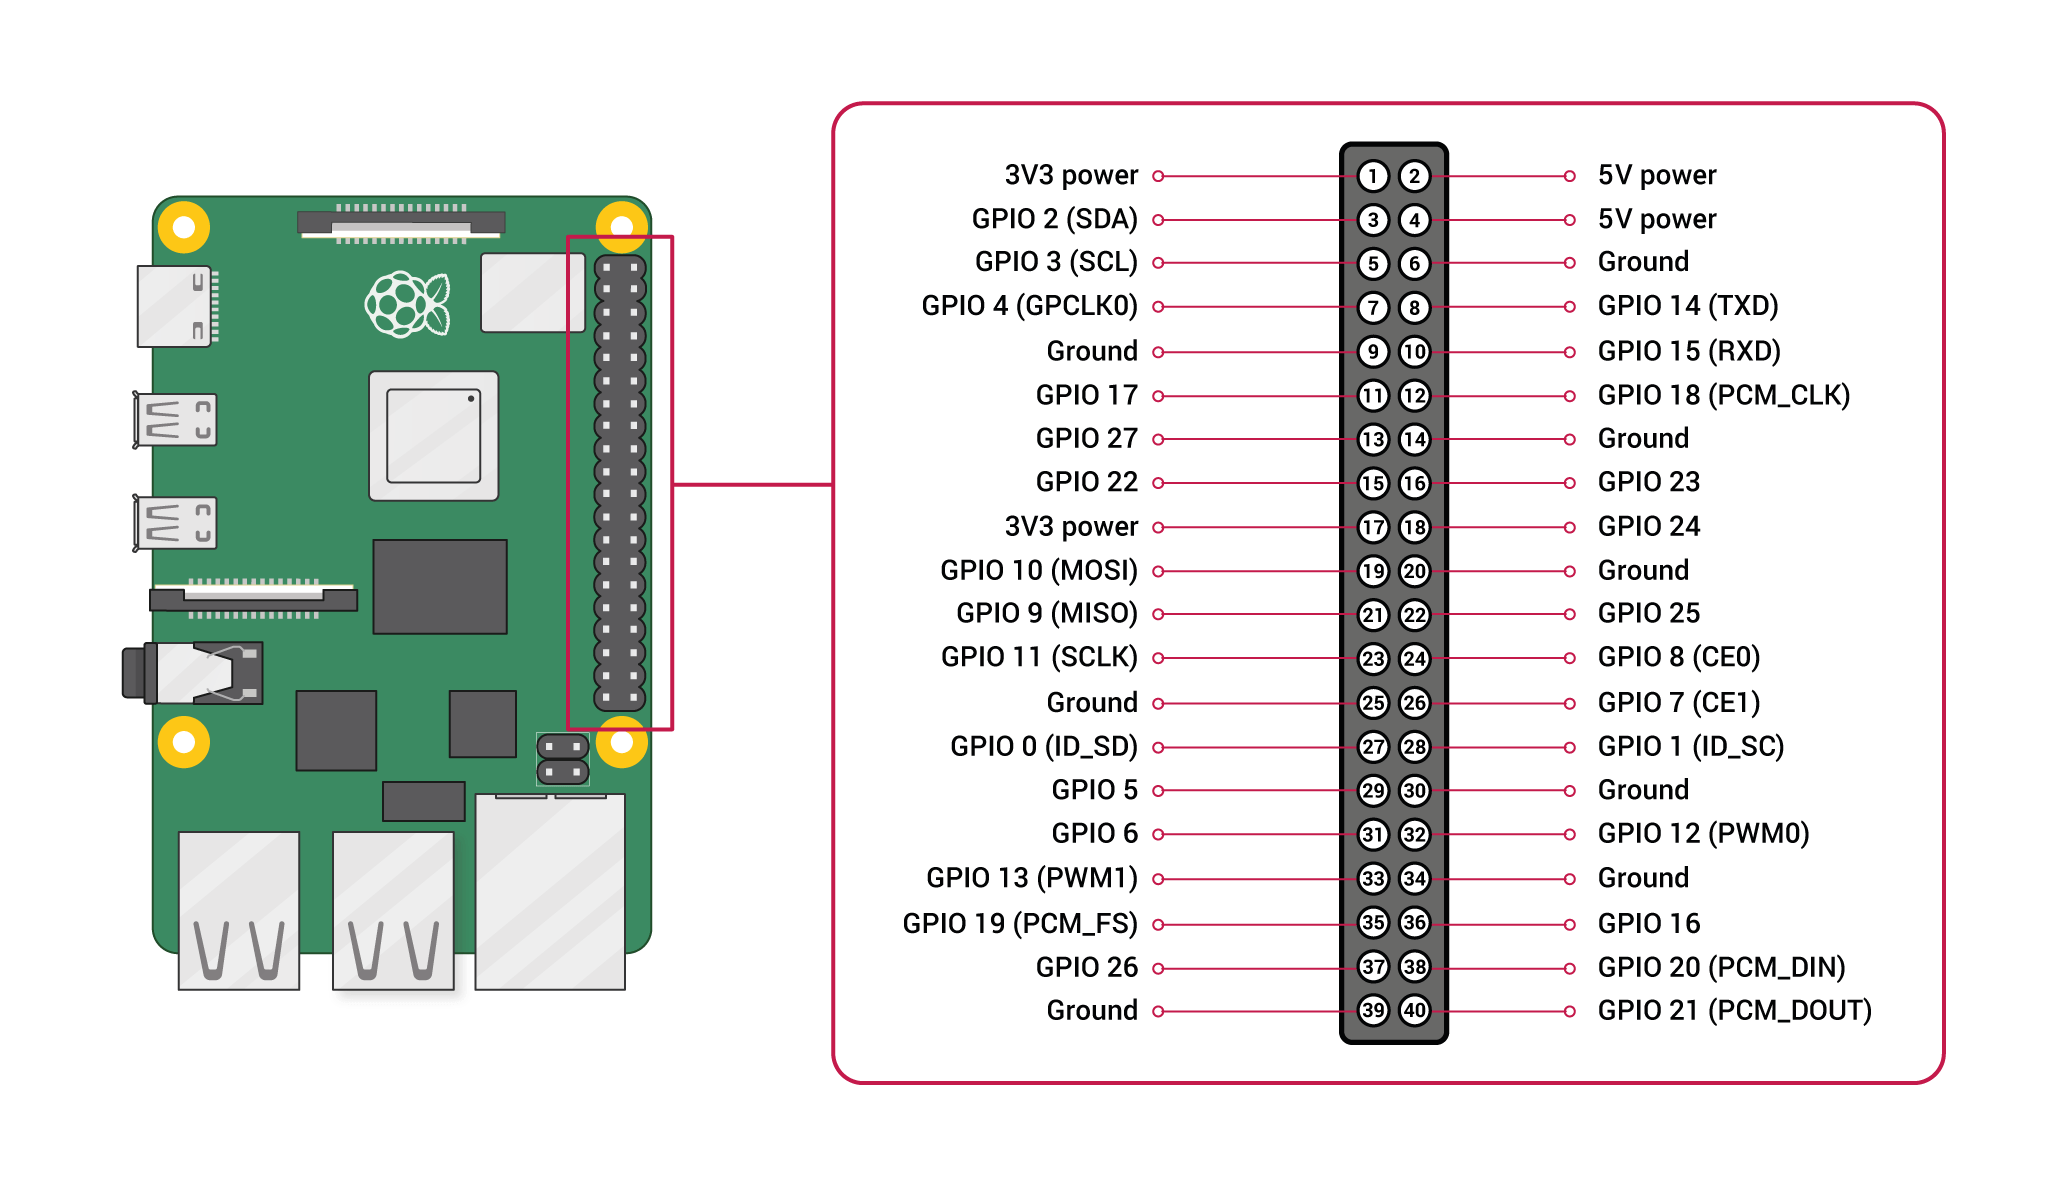
You need to enable I2C interface on your Pi. Run sudo raspi-config and
navigate to Interface Options > Enable I2C
Software
I wrote a script in Python to call the Pihole stats and update the display. The two libraries you need:
python3 -m pip install adafruit-blinka adafruit-circuitpython-ht16k33
The script is fairly straight-forward:
- create a loop for continuous update,
- inside the loop call the command to get the count,
- update the display with the count, and
- sleep to do it all over again next iteration
For displaying the number, I found using a zero padded string worked better then sending it a number less than 4 digits.
display.print(f"{current:0>4d}")
Here’s the complete script: pihole-led.py
Download and copy it to your Pi and run and hopefully it all works.
Run Script as Service
You likely will want to run the script as a service and to start automatically.
You can use systemd to help. Create a service file in
~/.config/systemd/user/pihole-led.service with the following.
[Unit]
Description=Display Pihole LED
After=pihole-FTL.target

[Service]
Type=idle
WorkingDirectory=%h/src/mkaz/pi/pihole-led
ExecStart=/usr/bin/python3 pihole-led.py
Restart=always

[Install]
WantedBy=multi-user.target
Enable the service using: systemctl --user enable pihole-led
Start the service using: systemctl --user start pihole-led
Combine Pi & LEGO set
This was tricky to disassemble the LEGO set in the right spots so the Pi would fit. I just took it slow and tried not to disassemble too much at once. I really wish electronics used standard LEGO measurement, nothing quite fits right for holding the Pi down, or wedging the display in the window.
My favorite part of the build is the ethernet cable comes in through the fire place, my own Floo Network.
Additional Resources
- Adafruit tutorial connecting 7-segment (adafruit.com)